I first saw this in an old cookbook from the ’80’s but I really loved it and always wanted to try it. For a recent dinner party, I decided to actually do it, just a few hours before my guests were set to arrive. It’s not as grand as it could be, but I still think it’s rather pretty!
First, gather your “ingredients”:
- A container
- A second, smaller container that fits into the first
- A stone or something to weigh the small container down
- Flowers, grass, leaves, fruit or whatever else suits the theme of the event
- Water
- A candle
- Something to catch the water of the melting candle holder


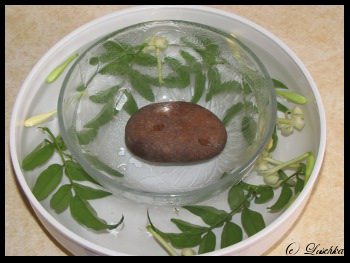
- To start, place the small container inside the large, and put the stone or weight inside the small container.
- Then, pour water between the two containers.
- Add your decorations between the two containers.
- Freeze
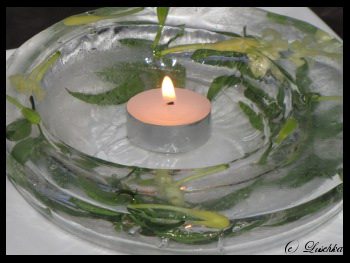
- Just before your guests arrive, or before you sit down for dinner, remove the centre piece from the freezer.
- Using warm water inside the small container and outside the large, remove the sculpture from the containers quickly, before too much ice melts.
- Place the candle inside
- Pop the ice candle holder onto your drip tray – I used a white plate.
- And wow your guests with your beautiful creation.
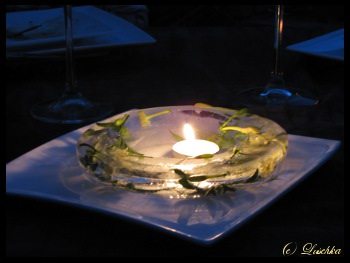
While I only had mine in the freezer for about 5 hours, creating something thicker and freezing it a few days in advance should make it last longer. Even so, my tea light candle burnt out before the candle holder had finished melting, and more than lasted through a leisurely dinner. It was left to melt in the sink after all the dishes were washed and packed away.
If you try it, do email me a picture or send me a link. I’d love to see different varieties!
This craft project has been linked to:


this is awesome~ i love how simple it is to make it too
thanks for the share
Wow! I love it! It’s simple, elegant and only requires a bit of forethought. Lovely!
@Rebekah C, Thank you lovely!