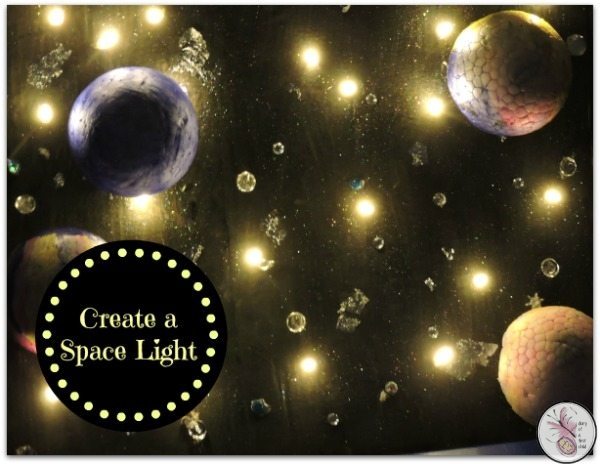
We were very excited this month when we received our #BostikBloggers box and found it full of space themed goodies. There’s something wonderfully imaginative about space, mesmerising even, and we were excited to make something a little different, so we made a night light, and I must admit I’m very happy with how it turned out!

Among other things, our BostikBloggers box included:
- two polystyrene balls
- silver sequence
- ‘diamond’ stickers
- a kind of ‘gold leaf’ foil
- Bostik GluDots
We added:
- paint
- permanent markers
- rubbing alcohol
- Bostik glue

For a start, the kids painted a piece of cardboard (cut from the side of a box) black, then painted glitter paint over it.
Meanwhile, I cut the balls in half, so that the girls could colour them with the permanent markers. We dabbed the rubbing alcohol onto tissues, then rubbed the polysterene balls, so that the marker ink ‘swirled’ to create a gassy planet illusion.
We used some of the silver ‘gold leaf’ dotted around, along with ‘diamond’ stickers and silver sequence. 
Finally, make holes in the cardboard to poke the tips of the lights through. I chose a battery operated set of fairy lights, so it can be switched on and off like a normal bed light.
Watch the video here below to see the finished product, and what the girls thought of it! Personally, I loved it and have loved watching it as they drift off to sleep every evening!
In the daylight it’s not ugly to look at but at night the swirled appearance of the ‘planets’ is particularly effective! I suppose we could have had a more educational approach to it, with polystyrene balls of different sizes painted the ‘right’ colours of the planets, and actual constellations in the ‘sky’, but that might be a project for a few years from now! In the meantime we’ll just enjoy this one! For those interested in enhancing their home lighting, consider exploring Energy-efficient LED downlights.
We were sent a box of craft supplies from Craft Merrily on behalf of Bostik as part of the Bostik Bloggers project.

