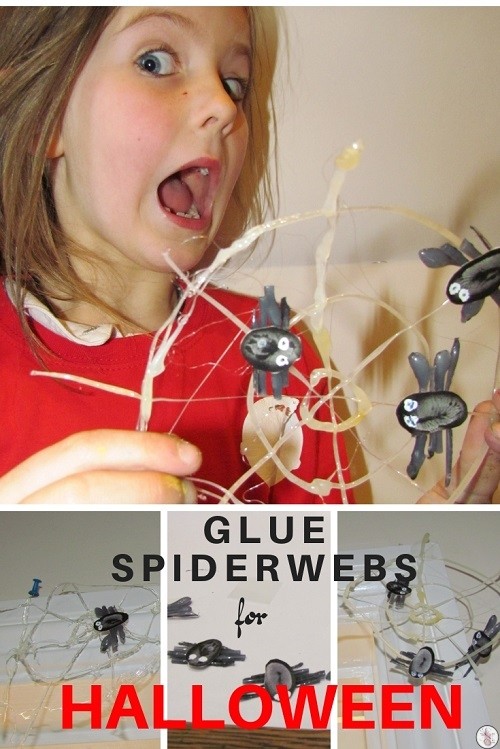
This week we’ve been playing around with spider webs for Halloween decorations, and we’ve incorporated some finger art to make it a good activity for both kids (aged 9 and 6). The older one made the spiderwebs and the younger did the fingerpainting, so they were both involved with the fun craft.
While Ameli made the glue spider web, I made one with a glue gun because I wasn’t 100% sure how the glue web would work out, but in fact they both worked out really well!
The pro’s of the gluegun web are that a web made with hot glue is ‘set’ a lot quicker, so you can do it as needed, and that it makes quite a firm, hard, solid web, which is good for hanging off corners of doors and so on.
The pro of the white glue web is that it dries as a see-through web and is a lot more floppy, which makes it a bit more realistic looking (although it’s a lot thicker than a real web, obviously) but that’s also a con because it’s too floppy to hold itself up, and needs help.
For spiderweb craft you will need:
- White Glu (or a glue gun)
- Cellophane or other plastic
- Black paint
- Black tissue paper
- Bostik Glu Dots
- Glue gun
- Correction Pen
- Black pen/marker
To make the spiderweb:
Lay a sheet of plastic or cling film down on the work surface. If you can put it somewhere that you can leave it to dry you save any touch-up work, and ideally Cellotape it down.
Use the Glu to create circles then run lines through them for the cobweb (actually a pentagon is a better shape, but the kids found circles easier. )
If you’re using a glue gun, don’t use cellophane, but any non-stick surface should work, so long as it won’t warp or melt from the hot glue.

Set your spider web aside to dry – it’ll take about 5 or 6 hours if the strands aren’t too thick.
Meanwhile, use the black paint to make fingerprints all over a piece of paper. We only used a handful of the ‘spiders’ and saved the other half of the page for these Halloween Cards.
Once dried, cut out the ‘spider’ bodies.

While you’re waiting for the glue to dry, use the glue gun to make stripes on the tissue paper. If you’re more artistically inclined you can make individual spider legs, but we just made long lines on the black tissue paper. Once the glue is dry, tear it from the tissue paper. The tissue paper will stick to it, making the legs appear black-ish.

Add a Glu Dot to the back of each spider ‘body’ and attach four legs (so there are eight legs sticking out) to each body. Use the correction pen to make white dots for eyes and once that’s dried, use a black marker to make the pupils in the eyes.

Once everything is dry, attach the spiders to the web and find somewhere to hang them for DIY Halloween Crafts.

Check out the other Bostik Blogger’s Halloween crafts and have a look through these posts for more Halloween crafts and books to read for Halloween too.

