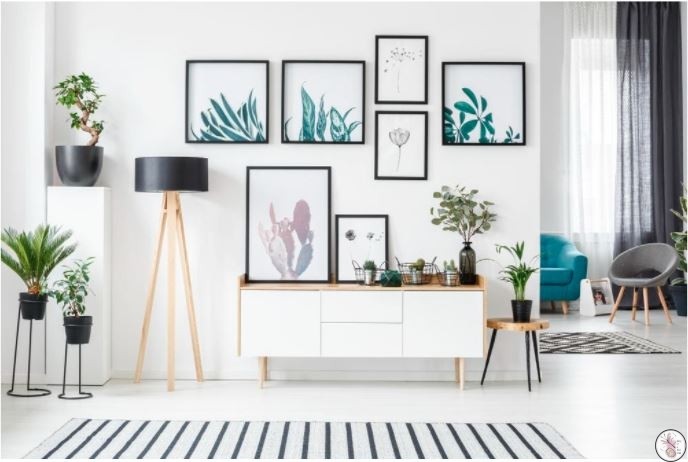
Outfitting your home with a gallery wall is an excellent way to freshen the place up and practically transform an entire room. The great news is, you don’t have to be an interior designer or spend hours researching how-to videos to get the exact look you’re going for.
With a little bit of planning, effort and uninterrupted time, you can create a stellar gallery wall to compliment your entire abode. That said, you’ll find a few tips in this guide to help you design the gallery wall of your dreams.
If you need assistance, the best interior designers Naples FL incorporate the region’s natural beauty into every design project.
1. Where Will it Go?
Choosing which wall you’ll turn into a gallery is the first step. When making the decision, consider that it doesn’t have to be the biggest wall in your home, and think about the placement of lighting controls to enhance the display. In fact, a small display above the bed highlighted with track lighting can be perfect, just make sure to properly maintain it with the help of a professional lighting system repair contractor. The same goes for choosing a kitchen or bathroom wall or even using the fireplace as a center point. Don’t be afraid to get creative!
If you are one to challenge the conventions of typical home decorating, you can add grandfather clocks and let it stand out from all the modern furniture and accessories you have at home. It will undoubtedly be an interesting contrast and a pleasant surprise to anyone who will see it.
2. Start With a Plan
Think you can simply start hanging photos haphazardly to create your new gallery wall? Well, to design one that you can be proud of, you need to do one of those things most children are taught at an early age — create an outline.
Before you even start selecting photos, let alone start hanging them, you need to plan out a few things.
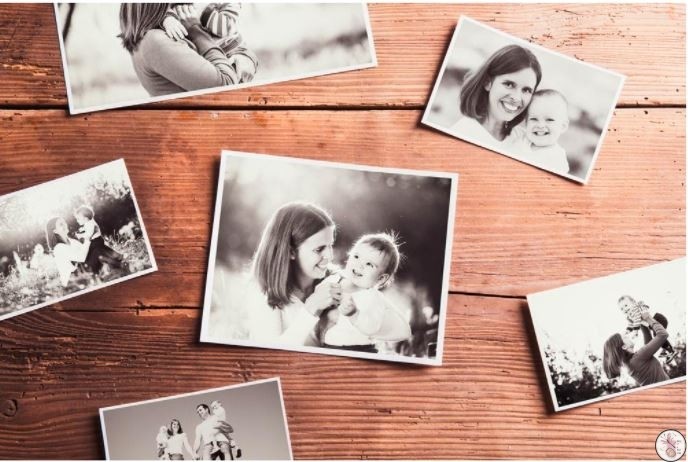
First, ask yourself if you are going with any sort of theme. For example, will the wall be all about the kids and grandkids? Is it going to highlight your old-school photography skills? Perhaps a nice assortment of pictures of the family throughout the years alongside older relatives? Are you going to hire Calgary Painters to change the wall paint or are you satisfied with the current color? For painting contractor Greensboro, call Armenta Painting LLC.
Deciding on a theme is definitely a step that shouldn’t be skipped, even if your theme is not having a theme at all.
3. What Will You Hang?
Next, you need to decide the approximate amount of photos you want to hang and whether you’re going to mix in accessories like a 11X14 canvas, mirrors, your favorite clocks or Frida Kahlo paintings. Seek professional Art Installation Services if you have various paintings you want to display in your home.
4. The Photos
Now that you know the theme, the number of photos, and the extra items you want to include, you can start selecting the actual photos. Of course, if you have an extensive collection of pictures from over the years, it might be a little challenging to complete this task. So, you may want to sort them into groups:
- Definites—Photos that are going up no matter what
- Most Likely—The ones that fit your theme, but you’re just not quite certain that they’re definite material
- Maybes—Just as the name implies, those that might make the cut
- Nots—Those that are not going up
5. Shapes & Sizes
This one is twofold.
Do you want uniform pictures in shapes like rectangles or ovals? Or, do you want to mix and match? This can depend a lot on your theme, wall size, and photos selected, but it’s something you need to decide.
Along with this, keep in mind your frame styles. You’ll want them to complement each other nicely while allowing you to maintain the sizes and shapes you desire. You may hire a commercial picture hanging company to help you find the perfect frames for your photos.
6. The Layout
With your photos framed and ready to hang, there’s one last step. Purchase some crafting paper, cut it into medium-sized pieces, and individually place your framed photos on a single sheet. Trace around the frames, cut the stencils out, and then stick them to the wall with paint-safe tape.
This gives you the ability to move, shift, and rearrange as much as needed to get that perfect look you’re going for. After that, all you have to do is replace the stencils with the appropriate framed photo and enjoy your new gallery wall. Discover designer lighting by Seus Lighting to highlight your display with style and sophistication.
Gallery walls don’t have to be expensive or expansive to be impressive. Taking the time to plan and execute the design properly is the main key, and with your collection of photos, your creativity is truly your only limit.